Raycast Node
Procedural shading (if used correctly) is king. Far better than only using textures. In my mind good materials should ideally:
- Respond to their surroundings (Ambient Occlusion Node)
- Add ‘free’ detail (Bevel Node)
- Incorporate the underlying geometry (Geometry Node)
These nodes are G.O.A.T.E.D as the youth say. And now, the time has come to introduce a brand new goat to the family…
The Raycast Node (only available in Blender 5.1+)!
Here is how it works (or checkout the official documentation):
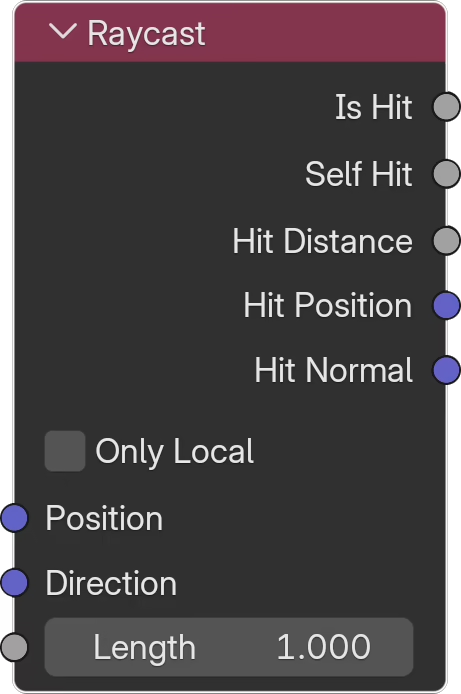
- Position (in) - where the ray emits from
- Direction (in) - the direction the ray travels in
- Is Hit (out) - does the ray hit anything
- Self Hit (out) - does the ray hit it's own source object
- Hit Position (out) - position of the ray hit (if any)
- Hit Normal (out) - normal of the ray hit (if any)
Raycasting in shading is a really big deal. Think of it as first contact between an object and it’s surroundings (whereas this was mostly impossible before). Rays shoot out and report back (if any) hit data. Better yet, it does this extremely quickly - perfect for shading.
The use-cases are both vast and disjointed. Here are some ideas I came up with for the tutorial:
- NPR stroke outlines (without freestyle or inverted normals)
- View-dependent thickness/depth maps
- Proximity based effects
I am confident this is just the beginning. In fact (and I’m not allowed to go into specifics), the studio I work at would greatly benefit from using this node to generate collision masks for transparency 🤫